Consistent characters in AI video: the same face, shot after shot
A common problem with AI video: she's one person in this shot and someone else in the next. Re-rolling until it looks right burns credits and still might not work.
In Nova, a character's face is held in place by a few "locks". This page follows the lessons in Nova Academy to show how to set them, and what order to check them in when a face drifts. Every step has a lesson number.
1. Give every character a headshot
The face is locked by the headshot. If the character page shows the red warning that headshots are missing and faces may drift, add the headshots before you go any further.
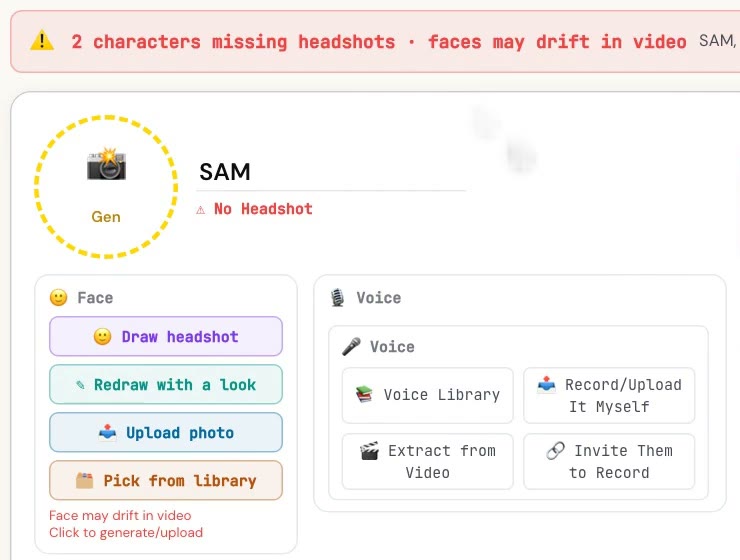
There are two batch buttons, and they're easy to mix up:
- Blue: fill the gaps. Only creates what's missing. Nothing is overwritten, nothing is charged twice. No confirmation — clicking it charges.
- Red: start over. Regenerates every image for every character, overwrites what's there and charges again. It asks you first.
The "N characters" on the button is a count of characters, not credits and not images.
If you already have a photo, uploading it as the headshot is free. Having Nova draw the headshot is charged, even though the button doesn't show a price.
→ Lesson 04-02 "Lock the characters: blue fills gaps, red starts over". You finish with 3 characters × 2 looks + 3 headshots, with every red warning cleared. → What every button in the characters workspace costs: 10-T1 "Characters workspace · character tab: which buttons show a price, which don't" and 10-K "Characters workspace: seven things the buttons don't tell you"
2. Several looks per character: render first, then lay out shots
A character can have several looks, and you choose which episode wears which. Select the character on the Characters page and work in its "Outfit Archive":
1. Click "↻ Rescan Outfits". It reads the whole script and pulls out the outfits this character wears. The button shows 55 credits. It only adds, never deletes, touches only this character, and doesn't ask before charging. When it's done, the log says existing looks and images were all kept. 2. Open a look's card. "Appears in:" lists the episodes that use it (E01 / E03…). 3. If the script didn't produce a look you need, click "+ Add Outfit" to add one. That's free. 4. Click "Gen Looks" ("Generate This Look" when one look is selected) to render the look images. The button shows the price: 50 credits per look.
Order matters: render the looks first, then lay out the storyboard. Laying out shots only assigns looks that already have images. If you add a look afterwards, write "@Name·Look" in the shot, or lay the shots out again.
→ Lesson 10-03 "Looks: how many per character, which episode wears which — render first, then lay out"
3. Face still changing? Check four locks, in order
The first checks are free; only the last one costs. Don't start by re-rolling.
Lock 1: is the character attached to this shot? Look under the shot at "✓ This shot will attach". Nova matches characters by name, exactly as written in the character library. A nickname or alias means the face isn't attached. Fix the name — no credits.
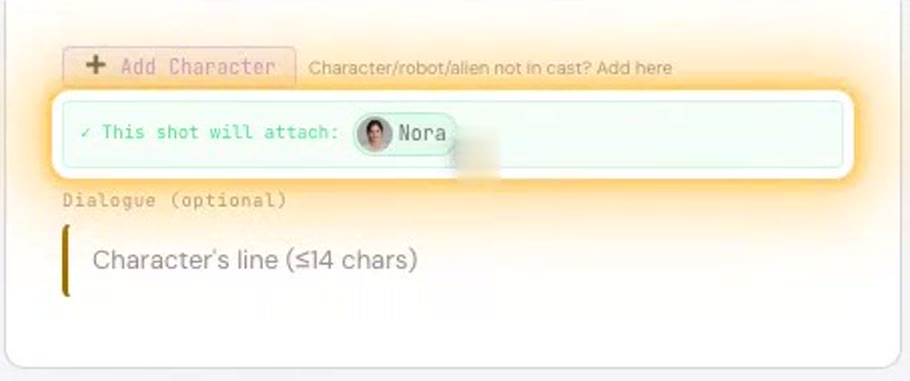
Lock 2: is there a headshot? Go back to the character page and look for the red missing-headshot warning. If it's there, add the headshot (step 1).
Lock 3: "not whitelisted yet". Refresh the page and try again. That attempt was blocked, so no credits were charged.
Lock 4: still drifting? Turn on the photoreal reference grid. It draws the people and props in this one storyboard beat into a single photoreal grid first, and uses it as the template for the render: who stands where, faces and wardrobe, prop size. About 50 credits a time, and it applies to this one beat only, not the whole film. You see the grid first, and the render only uses it once you confirm. Use it when text alone keeps giving bad takes or inconsistent characters — not on every shot.
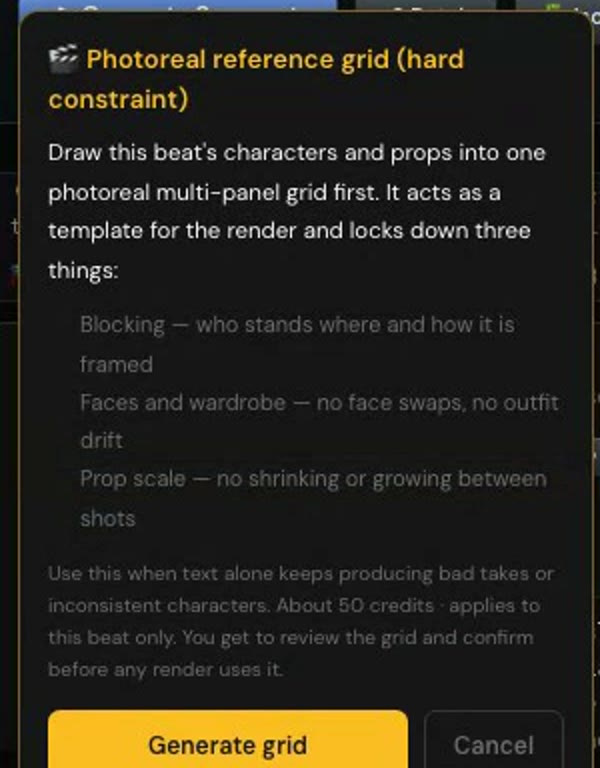
Re-rolling on its own won't fix a character who isn't attached or a missing headshot.
After rendering, check the receipt. On the storyboard page, select a shot that has been rendered: under its generate button there's a collapsed "📡 What was actually sent last time" panel, recording what really went to the model (shots that haven't been rendered yet don't have one). Open it and look at the "👥 Characters actually attached" line. If the character's name is there, their face was sent. If it shows the red "none (no character images attached!)", or their name isn't in the list, that shot was rendered without their face, so a different face is no surprise — go back through the four locks. The "Character refs" number on the line above counts every image sent, location images included, so it can't tell you whether the face went in.
→ Where the panel is and how to open it: Lesson 12-02 "Characters speaking the wrong language: find the language lock at the top of the receipt" (Bonus Q&A)
→ Lesson 12-03 "Same character, different face: check the four locks in order" (Bonus Q&A) → The grid and the camera-move reference: 03-04 "Camera-move and framing constraints: lock it before you draw — but locks aren't free". You finish with a side-by-side pair of clips: with and without a camera-move reference.
4. Matching a real person's photo: get their consent first
Two features base a character on a real photo, and they work differently:
- Look from a real photo: it rewrites the character's face and build, the two text descriptions. Steps:
1. Select the character on the Characters page and click "📤 Upload photo" on the portrait. That's free. "🔗 Face Locked" appears next to the name. 2. Click "📷 Look from photo". It rewrites the face and build fields from the photo, in both language layers. 30 credits; the button doesn't show a price and there's no confirmation, so it charges as soon as you click. 3. Click "👁 View what's sent" to see what it wrote.
Neither uploading nor rewriting the look asks about consent for you. Get the person's permission before you use their photo. Looks you've already rendered don't change; to match, render the look again at 50 credits per look.
- Learn wardrobe: asks two questions first — is this the same person, and do you have permission. Cancelling costs nothing.
Both only affect images made afterwards. Earlier images don't change by themselves.
→ Lessons 10-02 "Look from photo: one photo to line up the character's appearance" and 10-04 "Learn wardrobe, and match a reference grade: learn once, use it for the whole show"
5. Making an ad: people are checked, products aren't
In an ad, two things usually have to stay the same in every shot: the person and the product.
- The person: generate a portrait for whoever's on screen. When "This shot will attach" shows their name under the shot, they're locked. If a character has no image, the render is refused and nothing is charged.
- The product: if a prop or scene has no image, nothing stops you. It renders anyway, and that's when products warp. Handle the missing image yourself: upload a real product photo, or add one.
→ Lesson 01-03 "Lock what has to stay the same: the person, and the can" (Starter). You finish with one character portrait, and the yellow warning bar at the top of the page gone.
FAQ
My AI video characters keep changing faces. What do I check first? Whether the character is attached to the shot, with the name exactly as it is in the character library, and whether the headshot is missing. Checking and fixing both is free, and that's where most face drift comes from.
Does the photoreal grid lock the whole film? No. It covers the current storyboard beat only, about 50 credits each time. Use it on the beat that keeps drifting.
Can I base a character on a friend's photo? Yes, but get their permission first. The look-from-photo feature won't ask for you.
Will every shot come out identical? These locks rule out the usual causes of face drift, but AI renders still vary. What the lessons teach is the order to check things in, and which steps cost credits.
Where to start
- Just looking: sign up free, no card needed, and watch the free lessons.
- Locking the person and product in an ad: 01-03 is in Starter. The characters workspace and the photoreal grid are in Creator. Compare courses
- How to break a script into shots and stage them: AI storyboard tutorial.